How to Design with the Manual SubcontractorHub Tool
The Manual Design Tool in SubcontractorHub allows users to draw and edit solar designs directly. It supports detailed adjustments to roof facets, mounting areas, and panel placement.
Follow the manual tool walkthrough to learn how to use the SubcontractorHub design tool.
New Functionality!
You can now use the SubcontractorHub design tool on a tablet/ipad with touch functionality.

Manual Solar Design
Step 1: Zoom in and align the house with the crosshair. Click on the “Set House” button.

Step 2: The manual design tool will open to drawing mode.

Step 3: Use the buttons on the left to accomplish the following design procedures.
From bottom left:
Zoom Out
Zoom In
Move
Hide Facets
Hide Unselected Panels

Step 4: Draw facet lines. Click on the undo button to remove gutter lines or any mistakes, before completing a facet.

Step 5: Set the azimuth direction and click on the “Done” button.

Step 6: To edit mounting areas, click the pencil icon in the top left corner.

Step 7: Use this feature to do the following:
Edit mounting plane.

Move and rotate panels.

Edit panel orientation.

Click on the “Yes” button to change the orientation.

Step 8: Use the dropdown menu to select the required solar module.

Step 9: Click “Calculate” to populate the solar details.

Step 10: You can toggle between Google Solar and NREL LIDAR data sources from this dropdown.

Step 11: Click “Done” to continue.

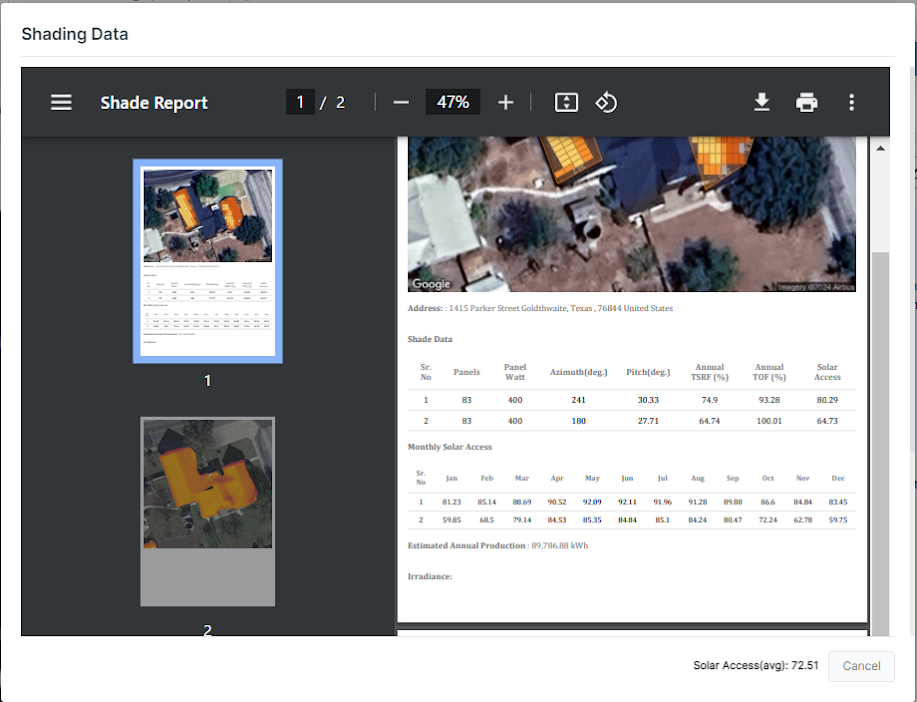
Step 12: Click “Shading Data” to access the shading data report, which includes solar irradiance data. The irradiance image will look different depending on which LIDAR data source was selected in step 9.

Note: Now the shading report also shows the Annual TSRF and Annual TOF data along with the Solar Access data.