How to Edit an Automation with Multiple Triggers
Follow the steps below to add multiple triggers and edit them in an automation:
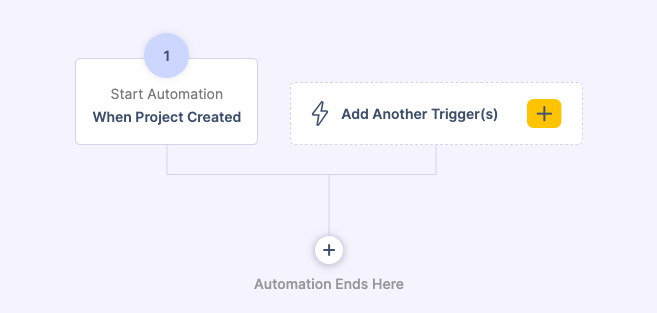
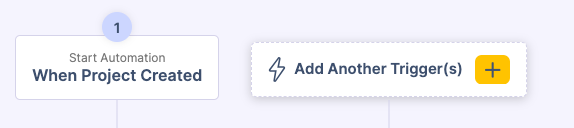
Step 1: After setting the title, module and job of the automation, click “Add Start Trigger”.

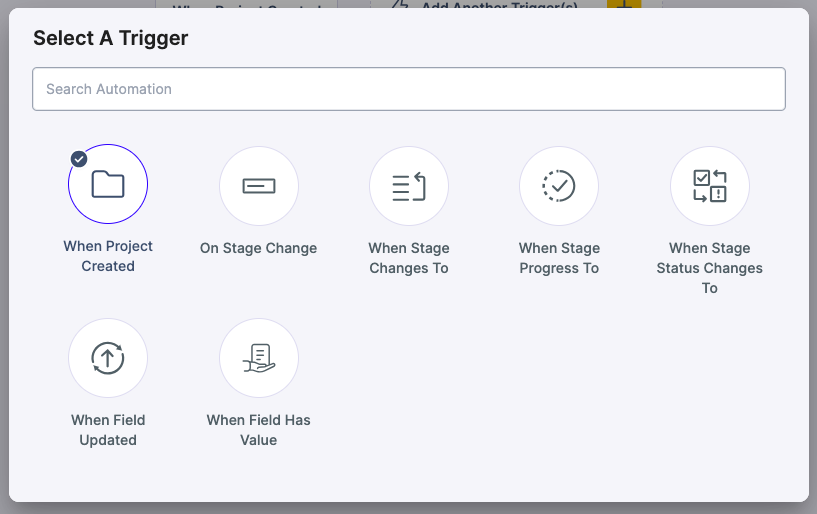
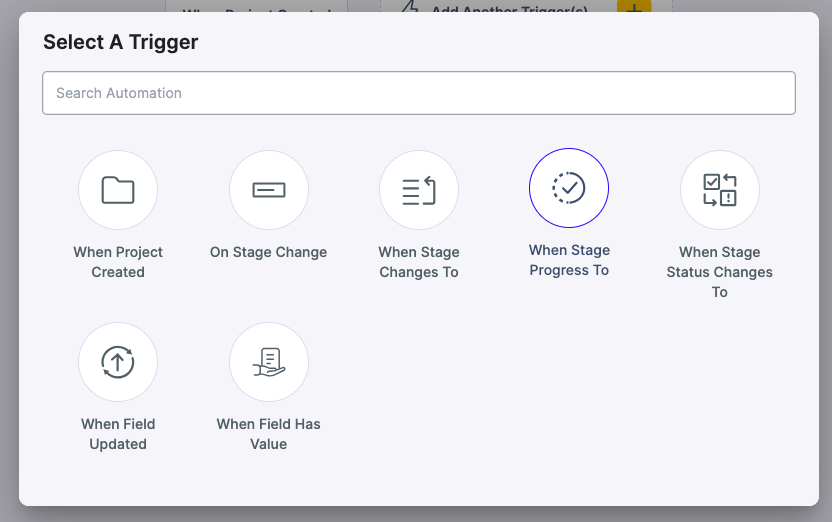
Step 2: Select the trigger.
Step 3: Click “Add Another Trigger”.
Step 4: Select the “trigger”.
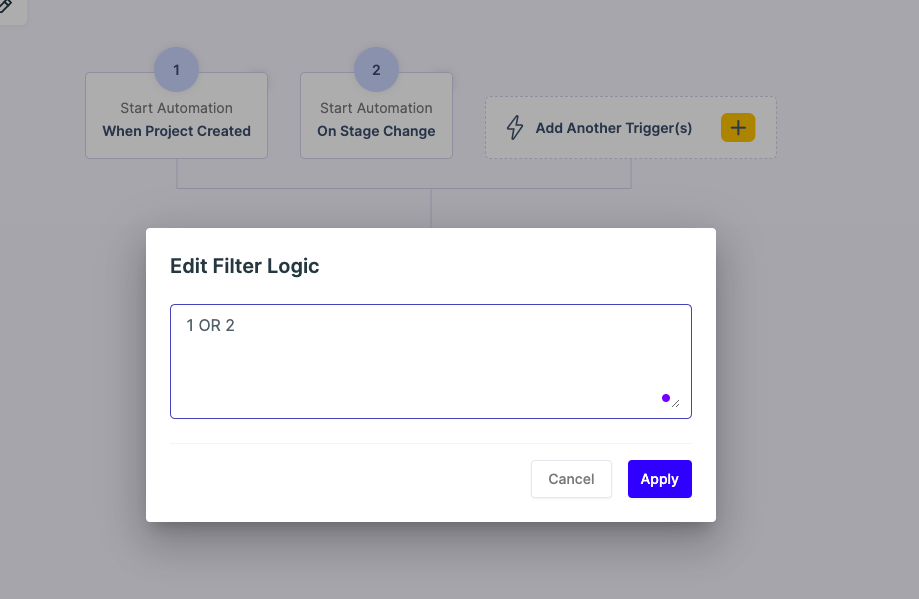
Step 5: Click on the top-right corner to edit the trigger conditions.

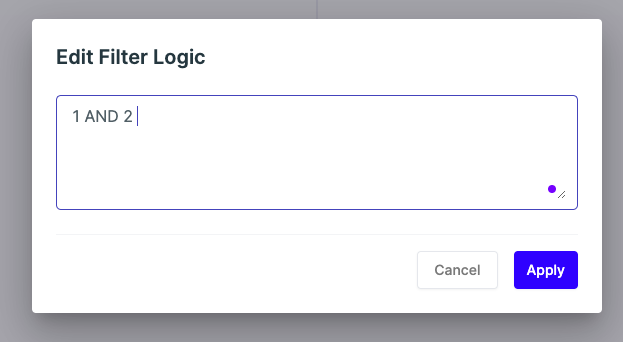
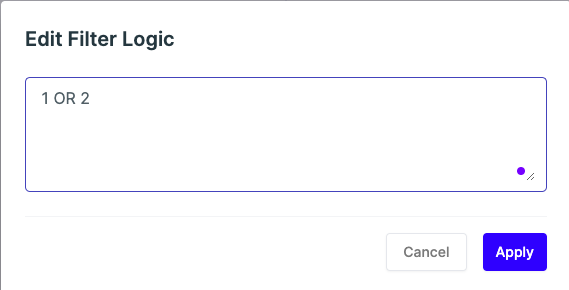
Step 6: Here you can use one of the two filter logics:
- ‘AND’: This logic will activate the automation only when both the triggers are met.
- ‘OR’: This logic will activate the automation even if one of the triggers is met.
Step 7: Click “Apply”.
Now, you have set the filter logic for your automation successfully.
Note: You can also add a Utility trigger for automation. You can create custom fields from the Page Layout.
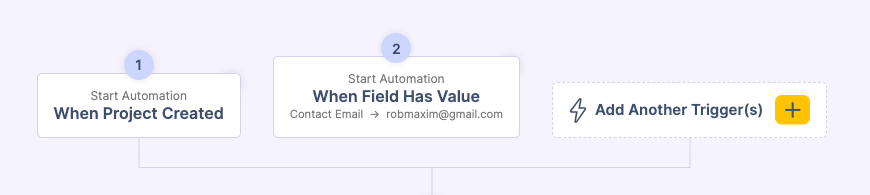
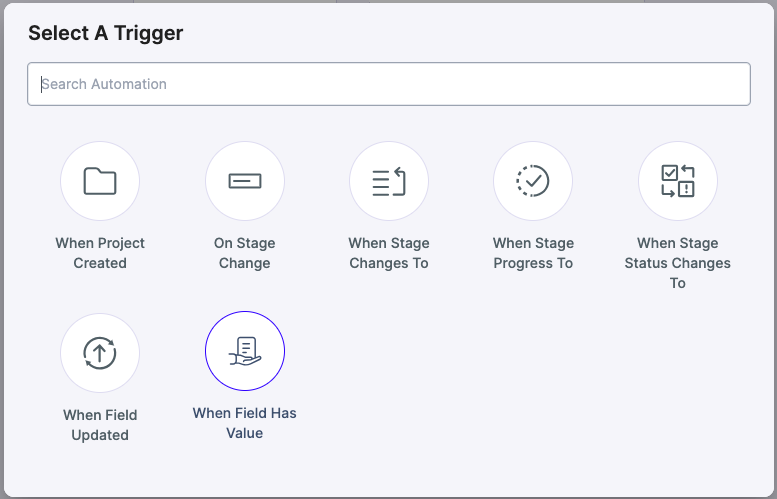
Step 1: Click “Add Another Trigger”.
Step 2: Click “When Field Has Value”.
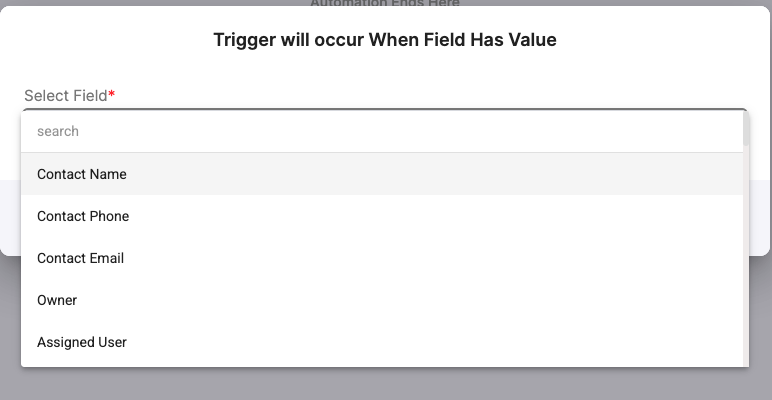
Step 3: Select event from the dropdown.
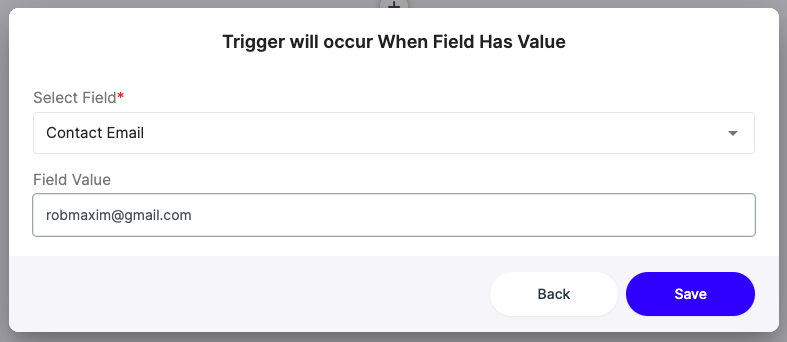
Step 4: Enter the field value.
Note: The "When Field Has Value" condition functions similarly to an "If Field Value" check in an if/else logic. It verifies whether a specific field, such as contact email, matches the value entered in the Field Value box.
- If you enter abc@example.com, the condition will trigger only when the contact email exactly matches that value.
- If you leave the Field Value blank, the condition will trigger as long as the contact email field is not empty.

Step 5: Click “Save”.
Your trigger is created successfully.