Customer Page Layout
Follow the steps below to create your own customer page layout
Step 1: Locate the “Manage Database” tab on the left-hand side and click "Database".

Step 2: Click the “Page Layout” tab on the left-hand side.

Step 3: Click “Layouts”.

Step 4: Click “Customer”.

Step 5: Click on the “Add” button on the top right corner to add a new layout.

Step 6: Add the page name and assign the role of the new page layout.

Step 7: Under Layout Type, select “Add” to create a new layout for the “Add New Customer” page and select “Edit” to create a new layout for the “Edit Page” of the customer.
Click “Next”.

Additional Information
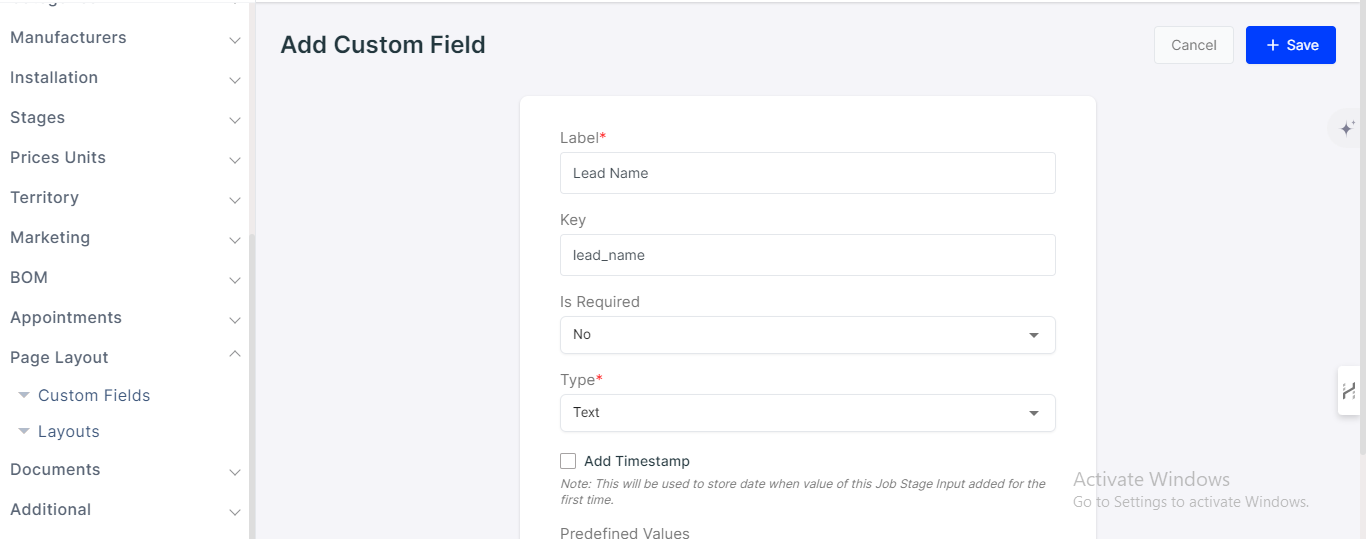
Before adding a new page layout, you have the option to create custom fields for the page. Simply navigate to the "Custom Fields" section under Page Layout and select "Customer" within the Custom Fields menu.

Click "Add" on the top right corner to create a new custom field.

Just add the label for the new field, select its type, predefined value and click “Save”.
Your new custom field is now ready to be added to your new project page layout.
Step 8: Scroll down and click “+ Add” to add a new custom section to the page

Step 9: Add a name for your custom section.

Step 10: Drag and drop standard and custom fields to populate custom sections.
Note: You will not be able to save your layout if you fail to add mandatory fields to it. The mandatory fields are highlighted with a red asterisk mark next to them.

Step 11: Click “Save” to save your new customer page layout.
