How to Set Up Webhooks
Webhooks are HTTP callbacks that can be used for sending real-time data to another system when a specific event occurs.
You can use the webhook from SubcontractorHub to send data or notifications when an event is triggered, such as when a lead is created or when a project gets updated
Step 1: Locate “Manage Database” and click "Database" on the main menu.

Step 2: Click on “Webhooks” under the “Additional” dropdown.

Step 3: Click “+ Add” in the top right corner.

Step 4: Add the name of the webhook.

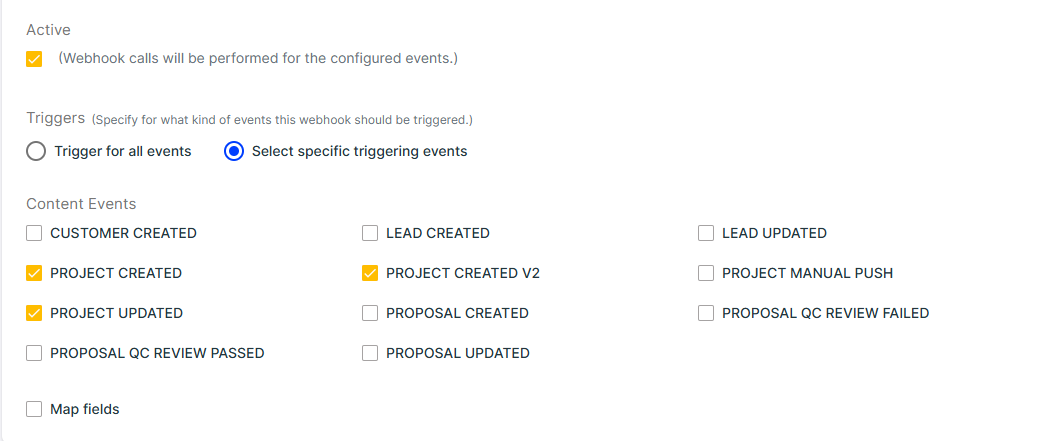
Step 5: Select the action that will direct the data to the webhook.

Step 6: Add the URL.

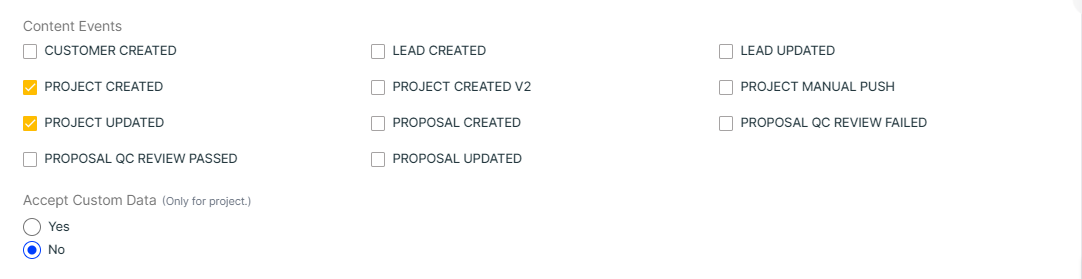
Step 7: Select your Trigger event and Click “Save” on the top right corner to save your webhook.

Additional Information
SubcontractorHub users now have the capability to push Custom Data for their events via Webhooks. By selecting a trigger applicable to all events, users can access the "Accept Custom Data" section where they can opt to enable this feature and choose specific Project keys for data push to the server. Additionally, users can review and select mapped fields associated with the chosen project key. Consequently, only the designated custom data will be sent forward when the event is triggered, ensuring streamlined and tailored information handling.
Custom Data push via Project keys
Step 1: When you opt for "Trigger for all events", an option to "Accept Custom Data" becomes accessible. This feature enables you to selectively curate and transmit only the custom data chosen to be dispatched via the webhook.

Step 2: Select “Yes” and click on “Project Keys”.

Step 3: Select your preferred project keys that need to be pushed with the webhook.

Step 4: Configure and map your selected fields and click “Save”.

With the selection and configuration of project keys, only the data pertinent to those selected projects will be forwarded through this webhook.
By utilizing SubcontractorHub's webhooks, customers can automatically send notifications, real-time updates, or data to their systems the moment an event is triggered. This ensures that all stakeholders are promptly informed about critical developments, such as lead generation or project updates, enhancing responsiveness and decision-making efficiency.
Follow the steps below to review and check the activity logs for the webhook.
Step 8: Your new webhook is now available for review.

Step 9: Click on the “View Detail” button on the far right corner.

Step 10: You can find the Webhook details page, where you'll see the Basic Information tab that provides detailed information.

Step 11: Click on the “Activities Log” tab

Step 12: Click on the “View Details” button in front of the event name to check the detailed activity log for the event.

Note: You can also resend data using the “Resend Payload” button

You can also send new data using the “Re-Trigger Webhook” button

Step 13: Click on Request Data.

Step 14: You can find all the data that has been sent through the webhook under the Request Data section.

Note: Webhooks now include a new "Proposal QC Review Pass or Fail" event type, allowing you to automate review scheduling with instant notifications to keep projects on track.
Project Field Mapping for Webhooks
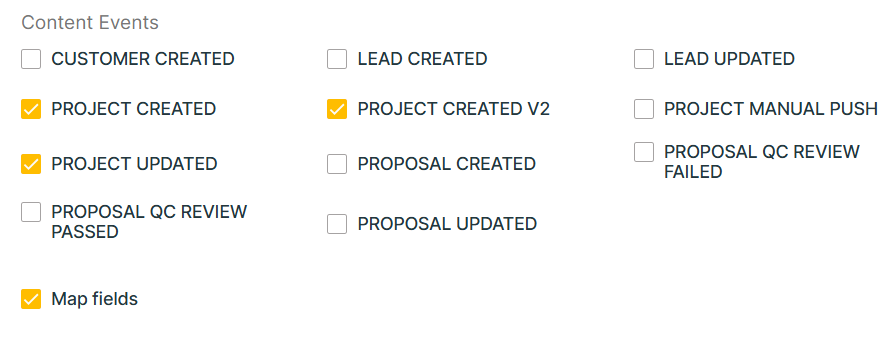
Step 1: When you create a new webhook, select project events to send your project field data .
Step 2: Select the “Map Fields” checkbox.
Step 3: Select your “Project Standard Fields”.

Step 4: If you are connected to an EPC, then select your EPCs to push project data.
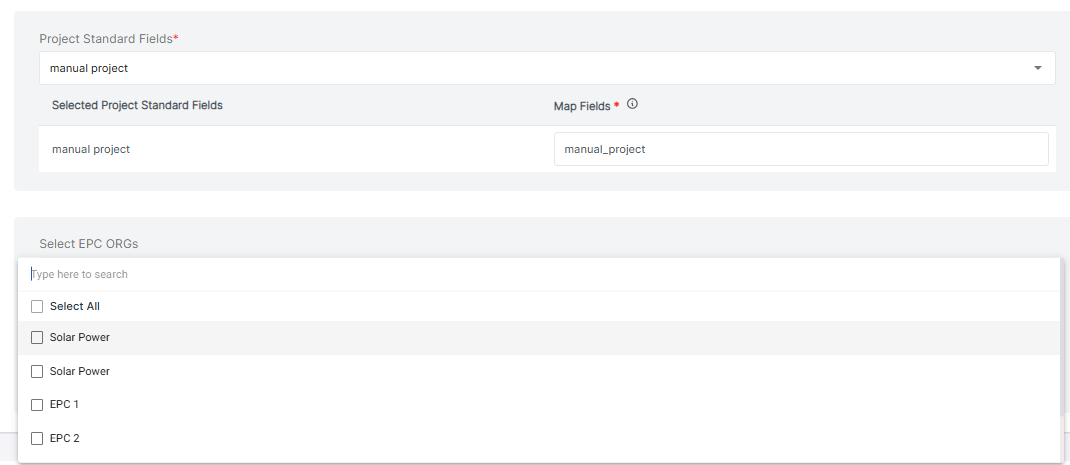
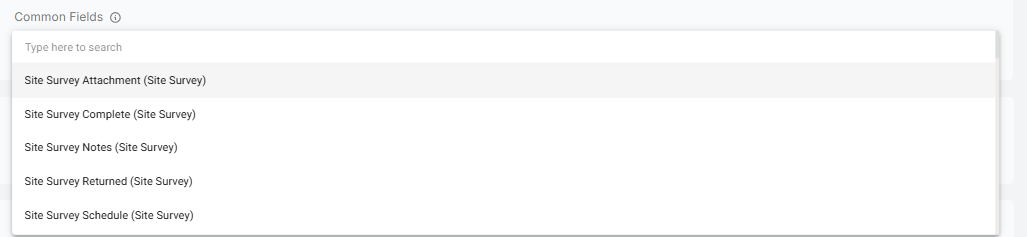
Step 5: Select your Common Fields (Common Fields are fields that are common between your organization as well as the EPC).
Step 6: Add your Map Field data.

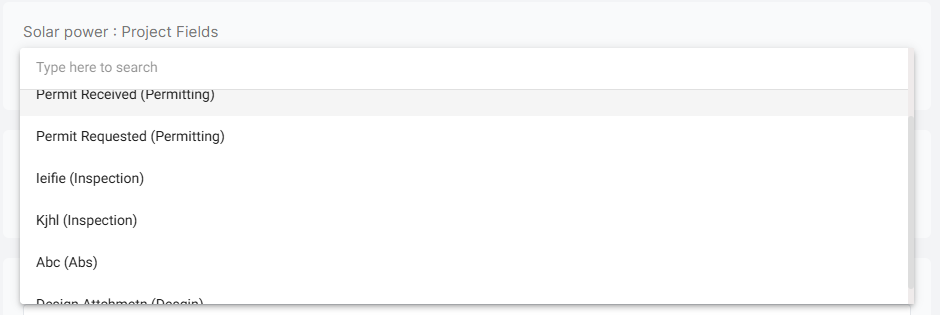
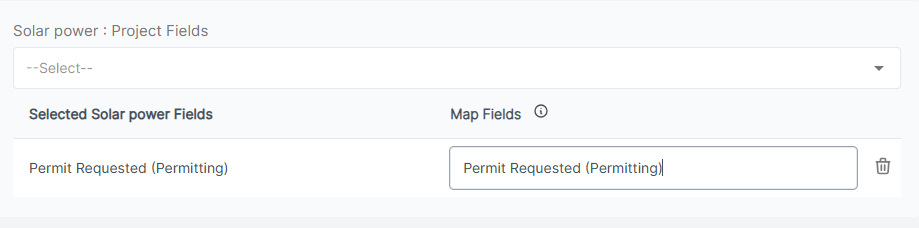
Step 7: Select your EPC’s project field.
Step 8: Map fields for your selected EPC and click “Save”.
Note: If your organization has set up a webhook for marketplaces, it can be triggered during the following events:
- When an offer is accepted
- When a work order is signed
- When a project is updated in the marketplace
